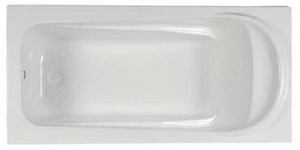
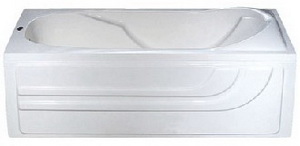
Technical Data
- Drop in & Alcove Bathtub Installation
How to Install a Drop-in Bathtub
Things You'll Need:

- Drop-in tub
- Frame
- Bathtub plumbing fixtures
- Cement or casting plaster
- Plastic sheet
Instructions
- Step 1: Check local building codes. This is especially important if you plan to build a wall or make other modifications to your bathroom that require a permit.
- Step 2: Measure the area and choose a bathtub. You will need to know the dimensions of your bathtub in case a new frame needs to be built, or an existing frame needs to be altered.
- Step 3: Build a frame or check for an existing frame. If you are replacing a bathtub, the frame may already be in place. The frame should be the height and width of the bathtub up to the flange (or lip) that will overlap the top of the frame.
- Step 4: Place the bathtub in the frame. Check that all edges are level by placing a level on each side of the tub. The floor of the frame should be smooth and level.
- Step 5: Mark the holes for plumbing fixtures. While the bathtub is in place (but before securing it), mark where the plumbing fixtures will go.
- Step 6: Remove the tub, and drill for plumbing. After the tub has been removed, drill holes for plumbing fixtures. Drill from the finished side of the frame (usually the outside) for the most attractive holes.
- Step 7: Install plumbing fixtures. After installation, check that the drain is secure and does not leak before putting the tub in.
- Step 8: Lay bedding material. This is the cement or casting plaster that will hold the tub in place. This material can be bought in any home improvement store. Place a piece of plastic over the bedding material.
- Step 9: Install the tub. Before the casting plaster or cement has cured, add the tub. Again, check that all edges are level, and make any adjustments needed. Screw the tub to the frame with the mounting blocks found under the lip of most tubs.
- Step 10: Finish the frame. The outside of the frame is often tiled to create a cohesive bathroom design. Make sure to leave an access area if you are installing a whirlpool tub (for future repairs). You can finish the frame with any materials that work with your interior design.
How To Install an Alcove Bathtub
An alcove bathtub is installed before finishing out the alcove with drywall or cement board and is installed with the nailing flange behind the drywall. The walls of the alcove surrounding the bathtub can be finished out with plastic or vinyl surrounds or ceramic tile. A drain waste overflow kit must be connected to the bathtub prior to installation. The kit contains all necessary components for proper drainage and to guard against overflow.
Thinks you'll need:

- hacksaw, level, drill, screwdriver, pliers, tape measure,
- saw, trowel, wrench, caulk gun, hammer.
- Materials:bathtub, drain waster overflow kit, shims, deck screws, roofing nails,
- dry set mortar, flashing, caulk, plumbers putty, soap
Instructions
- Step 1: Connect the faucet body the shower head fittings and faucet body to water supply pipes and attach assemblies to wall cross braces.
- Step 2: Check the drain waster overflow kit specifications to then properly cut drain pipe to proper height.
- Step 3: Fit the tub into the alcove by sliding it on the sub floor into position flush against the back wall studs.Ensure everything is in line and will fit properly once finished.
- Step 4: Protect the inside bottom of tub by placing a thick cardboard cover cut from the tub carton onto tub floor.
- Step 5: Shim the tub along walls and floor to guarantee the tub is level.
- Step 6: Mark the top of the nailing flange along each stud in the alcove and slide the bathtub back out.
- Step 7: Measure the distance from the top of the nailing flange to the bottom of the rim and minus that amount to obtain the height for the ledger board and draw a line along the studs.
- Step 8: Cut 1x4 ledger boards and attach them along the wall studs just below the line.
- Step 9: Adjust the drain waste overflow assembly to fit drain and overflow openings.Attach the gaskets and washers as directed by the manufacturer.
- Step 10: Apply plumbers putty to the bottom of the drain cover plate flange, then insert drain piece into hole. Screw the drain piece into the waste drain tube then insert the pop-up drain plug. Insert the drain plug linkage into the overflow opening and connect the overflow cover plate with long screws driven into the mounting flange on the overflow pipe.Adjust the drain plug linkage as directed by the manufacturer.
- Step 11: Prepare alcove by applying dry-set mortar to the sub floor.Lay runners across the alcove and apply soap or grease along top edge of runners.
- Step 12: Slide the tub into position over the runners, then remove the runners allowing the tub to settle into mortar.Push down on tub rims until they meet the ledger boards.
- Step 13: Nail the rum flanges into the wall studs around the tub, then attach the flanges to studs by drilling through the flange into studs until tub is completely secure.
- Step 14: Once mortar has dried(about 8 hours), install 4 inch wide roof flashing above the tub flange around the entire alcove.
- Step 15: Adjust the drain tailpiece to ensure the P-trap will fit around the overflow assembly then connect them with a slip nut.
- Step 16: Install the wall surfaces surrounding the alcove using cement board or waterproof drywall and finish with ceramic tiles or prefabricated bathtub surrounds.
- Step 17: Install the faucet handle and tub spout according to manufacturer and finally caulk around bathtub joints and faucet and shower seams.

 Facebook
 Twitter
 Google+
 Youtube
 Pinterest
 Houzz
Houzz